SMARTboard Assistance
Smartboard Resources for Hingham Public Schools:
This is a great repository for Smartboard files. Teachers should feel free to borrow and share their resources. http://smart.hinghamschools.org/
Smartboard Teacher Collaboration Page:
Please add to the HPS website Smartboard Resources to share your Notebook documents with all teachers in the district. Follow the directions below:
1. Open Firefox and go to: http://smart.hinghamschools.org
2. Choose 'sign in' at the bottom of your screen
3. Username: xxx Password: xxx (use your network account to login)
4. At the navigation bar, choose the 'page' you would like to go to: Ex: Elementary Schools
5. Choose a subpage listed (ex: 4th grade)
6. If you would like to add a file to the page, choose 'Add file', then browse for the file, then choose ‘upload’
7. If you would like to add a new page, choose the +plus icon at the top right of your screen, input a new page name at the prompt: 'Name your Page', then choose 'Create'.
8. When done, be sure to click the Sign Out button at the top of the window.
Smartboard Freeze/Mute:
You can have one image frozen on the SMARTboard while you continue to work on your computer. Use your remote button to FREEZE the SMARTboard image. The frozen SMARTboard screen allows you to work on your PC (ex: check email, etc) in private. Simply press FREEZE again to restore.
You can hide the image on your SMARTboard and still see it on your computer. Use your remote to MUTE the SMARTboard screen. The SMARTboard will go dark. Simply press MUTE again to restore the image to the SMARTboard. NOTE: Please don’t forget to power down your projector at the end of each day.
Smartboard Cleaning Tips:
Remove excess dry-erase ink residue with a damp cloth. Use an alcohol-free household glass cleaner such as Windex, to clean the writing surface. Do not spray cleaner directly on the surface. Also, try to use a dry-erase marker cleaner, such as Sanford Expo whiteboard cleaner. For stubborn stain, use isopropyl alcohol sparingly.
To remove permanent marker, use Sanford Expo whiteboard cleaner over the permanent ink stain, allow the solution to dry, then wipe the surface clean with a soft cloth. Also cover the permanent ink with high-odor dry-erase ink. While the ink is still wet, wipe the screen with a soft cloth.
Converting files to Notebook Software:
1. Scan pages and import them into SMART Notebook software:
*You will need a scanner attached to your computer
Launch Notebook software
Choose Insert/Picture from Scanner
Choose SCAN
Choose SCAN again
2. Convert a PDF file into SMART Notebook:
Open the PDF file in Adobe Reader
Choose File/Print
Choose Advanced
Choose Print as image
OK OK
It may take a few moments but SMART Notebook will open. You will see each page as a separate slide.
3. Convert a Powerpoint file into SMART Notebook:
Open Notebook
Choose File/Import
Choose the PPT file
OK
4. Convert Microsoft (Word, Excel, Publisher) file to SMART Notebook:
Open (Word, Excel or Publisher) file
Choose File/Print/Printer Name: SMART Notebook
This file will be saved as a .notebook file to your desktop
Open SMART Notebook and choose File/Open/filename
5. Use Screen Capture to paste a window to SMART Notebook:
Open the file you would like to capture (for example an MS-Word file)
Choose "File/Print Preview" in order to view the document in full-page mode
Click on the Notebook icon on bottom right of your screen
Choose "Other Smart Tools", then choose "Screen Capture Toolbar". A small window will open
Choose the first option, then drag your mouse over the region of interest
Notebook will automatically open with a picture of the file you want to view in Notebook
Be sure to save your Notebook file.
Orienting your Smartboard 600:
When orienting your SMARTboard, you may find that a finer alignment allows for more precise use. Here are directions to change the setting from the standard 9 point alignment to 20 point alignment.
Calibrating and Orienting your Smartboard 800:
1. click the SMART software icon in the Windows notification area
2. select SMART hardware settings
3. click Advanced settings, then click Calibrate
4. using the tip of a pen tray pen, press the red targets as they appear. Hold til the target turns green. Repeat
5. when done, the orientation screen will appear.
6. using the tip of a pen tray pen, press the red targets as they appear. Repeat until done.
Epson Brightlink 455Wi Integrated Projector:
There are currently three of this style at PRS: room 8, 13 and 23A. Please click here for directions on how to use and calibrate this whiteboard.
Classroom PC and VCR Connections:
This is a great repository for Smartboard files. Teachers should feel free to borrow and share their resources. http://smart.hinghamschools.org/
Smartboard Teacher Collaboration Page:
Please add to the HPS website Smartboard Resources to share your Notebook documents with all teachers in the district. Follow the directions below:
1. Open Firefox and go to: http://smart.hinghamschools.org
2. Choose 'sign in' at the bottom of your screen
3. Username: xxx Password: xxx (use your network account to login)
4. At the navigation bar, choose the 'page' you would like to go to: Ex: Elementary Schools
5. Choose a subpage listed (ex: 4th grade)
6. If you would like to add a file to the page, choose 'Add file', then browse for the file, then choose ‘upload’
7. If you would like to add a new page, choose the +plus icon at the top right of your screen, input a new page name at the prompt: 'Name your Page', then choose 'Create'.
8. When done, be sure to click the Sign Out button at the top of the window.
Smartboard Freeze/Mute:
You can have one image frozen on the SMARTboard while you continue to work on your computer. Use your remote button to FREEZE the SMARTboard image. The frozen SMARTboard screen allows you to work on your PC (ex: check email, etc) in private. Simply press FREEZE again to restore.
You can hide the image on your SMARTboard and still see it on your computer. Use your remote to MUTE the SMARTboard screen. The SMARTboard will go dark. Simply press MUTE again to restore the image to the SMARTboard. NOTE: Please don’t forget to power down your projector at the end of each day.
Smartboard Cleaning Tips:
Remove excess dry-erase ink residue with a damp cloth. Use an alcohol-free household glass cleaner such as Windex, to clean the writing surface. Do not spray cleaner directly on the surface. Also, try to use a dry-erase marker cleaner, such as Sanford Expo whiteboard cleaner. For stubborn stain, use isopropyl alcohol sparingly.
To remove permanent marker, use Sanford Expo whiteboard cleaner over the permanent ink stain, allow the solution to dry, then wipe the surface clean with a soft cloth. Also cover the permanent ink with high-odor dry-erase ink. While the ink is still wet, wipe the screen with a soft cloth.
Converting files to Notebook Software:
1. Scan pages and import them into SMART Notebook software:
*You will need a scanner attached to your computer
Launch Notebook software
Choose Insert/Picture from Scanner
Choose SCAN
Choose SCAN again
2. Convert a PDF file into SMART Notebook:
Open the PDF file in Adobe Reader
Choose File/Print
Choose Advanced
Choose Print as image
OK OK
It may take a few moments but SMART Notebook will open. You will see each page as a separate slide.
3. Convert a Powerpoint file into SMART Notebook:
Open Notebook
Choose File/Import
Choose the PPT file
OK
4. Convert Microsoft (Word, Excel, Publisher) file to SMART Notebook:
Open (Word, Excel or Publisher) file
Choose File/Print/Printer Name: SMART Notebook
This file will be saved as a .notebook file to your desktop
Open SMART Notebook and choose File/Open/filename
5. Use Screen Capture to paste a window to SMART Notebook:
Open the file you would like to capture (for example an MS-Word file)
Choose "File/Print Preview" in order to view the document in full-page mode
Click on the Notebook icon on bottom right of your screen
Choose "Other Smart Tools", then choose "Screen Capture Toolbar". A small window will open
Choose the first option, then drag your mouse over the region of interest
Notebook will automatically open with a picture of the file you want to view in Notebook
Be sure to save your Notebook file.
Orienting your Smartboard 600:
When orienting your SMARTboard, you may find that a finer alignment allows for more precise use. Here are directions to change the setting from the standard 9 point alignment to 20 point alignment.
- Launch Notebook
- At the Welcome Screen, choose Control Panel
- Choose SMART Hardware Settings
- At dropdown menu that reads “Pen and Button Settings, choose “Orientation/Alignment Settings”
- Choose the radio button named FINE (20 points)
- Choose OK
- Choose ORIENT
- Press the center of each target and release
Calibrating and Orienting your Smartboard 800:
1. click the SMART software icon in the Windows notification area
2. select SMART hardware settings
3. click Advanced settings, then click Calibrate
4. using the tip of a pen tray pen, press the red targets as they appear. Hold til the target turns green. Repeat
5. when done, the orientation screen will appear.
6. using the tip of a pen tray pen, press the red targets as they appear. Repeat until done.
Epson Brightlink 455Wi Integrated Projector:
There are currently three of this style at PRS: room 8, 13 and 23A. Please click here for directions on how to use and calibrate this whiteboard.
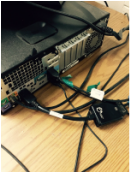
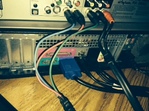
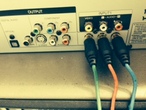
Classroom PC and VCR Connections:
|
|